It is always a treat when customers send us photos of the work they are doing. In this case they are lining a shower wall with waterproof cladding. The products we sell are easy to install so in many cases they actually carrying out the work themselves.
If customers do need to call on the services of a professional fitter they can be sure our products will keep the costs down. This is because they are so quick to fit. And they go up with little or no preparation.
Before And After
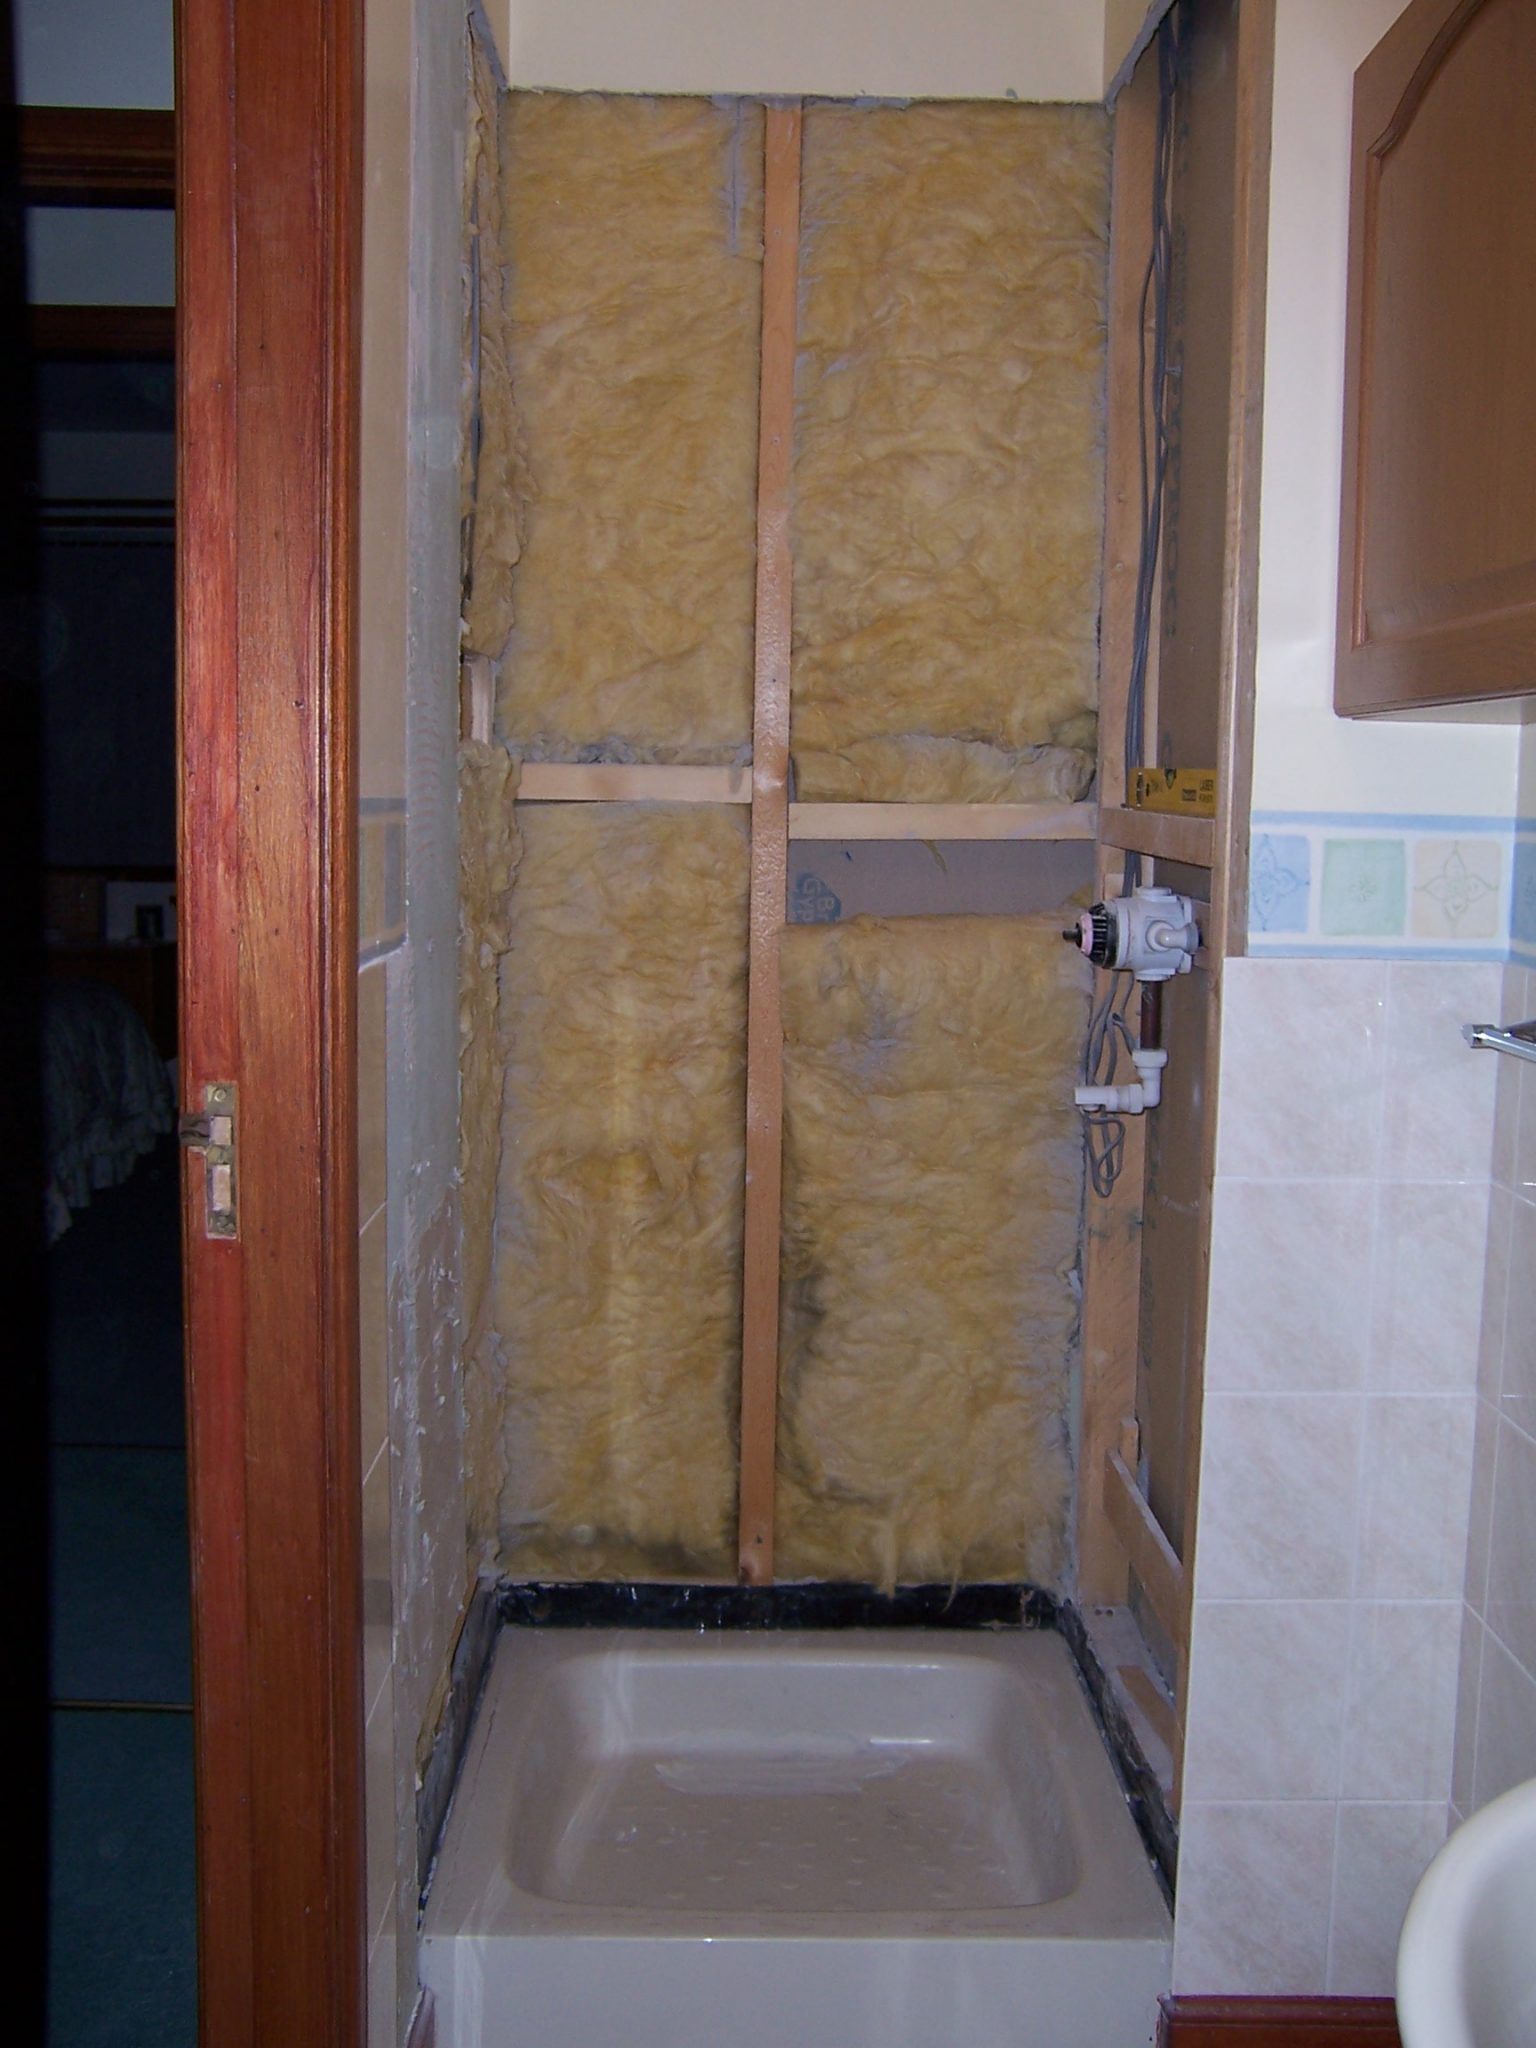
This customer needed to re-line their shower cubicle. Tiles have a nasty habit of failing over time. Grout will not tolerate any movement at all and will crack. Water then gets behind the tiles and starts to affect the adhesive. The grout will turn mouldy and the whole shower will start to look shabby.
The stud wall has insulation inside it which will help with keeping the room warm and will also help to deaden sound. The panels themselves also offer a degree of insulation as they are hollow.
The tiling in the rest of the room was fine so the cladding was limited to just inside the shower area.

Reinforcing The Walls
When fitting over a stud wall we would recommend covering the wall first.
The panels themselves are decorative not structural. So if you need to fix through the panels it is best to have something reasonably solid behind them. This also prevents the panels flexing excessively which could result breaking silicone seals.
You can use plywood or plasterboard. Tile backer boards can also be used available but these are more expensive. You do not really need the reinforcing to be waterproof as no water is going to get past the cladding.
It would appear that the tray has been installed with a waterproofing tape such as Aquastrap. This provides an extra seal between the tray and the wall – the most critical area for sealing inside a shower.


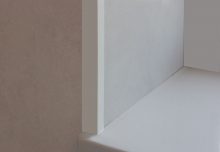
The panel chosen for this installation was a plain, gloss white. Vicenza Gloss White fits the bill perfectly This is the best choice if you have other areas of the room that have a patterned finish. This way you avoid anything clashing.
The ceiling above a shower can struggle with steam and deflected spray. Painted surfaces develop mould over time. And the paint can flake off in the moist conditions. If you are fitting plain white bathroom cladding you can use any off-cuts as ceiling panels making the whole area 100% maintenance-free.